Leaving to go on holiday, a business trip or just out hitting the pavement for a few days for sales and you’re wondering how to set up Automatic Replies for your email in Outlook in Office 365.
No need to worry because we have got you covered with this one!
Before we start we need to let you know that the Automatic Replies feature was formally known as Out of Office Assistant just so there isn’t any confusion.
So from here on in we will call the process of setting up an automatic response for your emails, Automatic Replies.
Where do you start setting up Automatic Replies?
Here are the steps for setting up Automatic Replies in order.
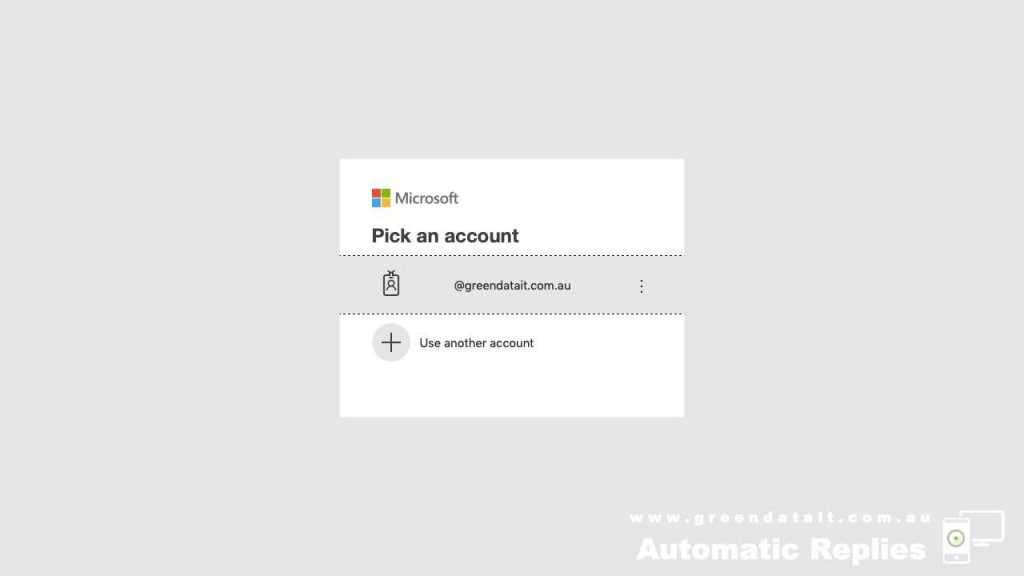
Log into your Microsoft 365 Business account.
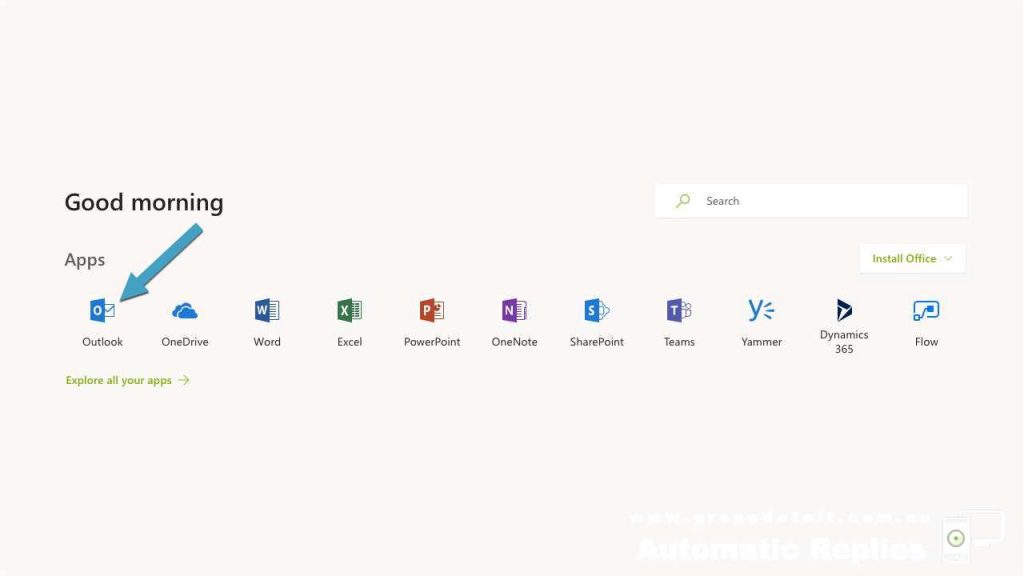
Click on the Outlook App.
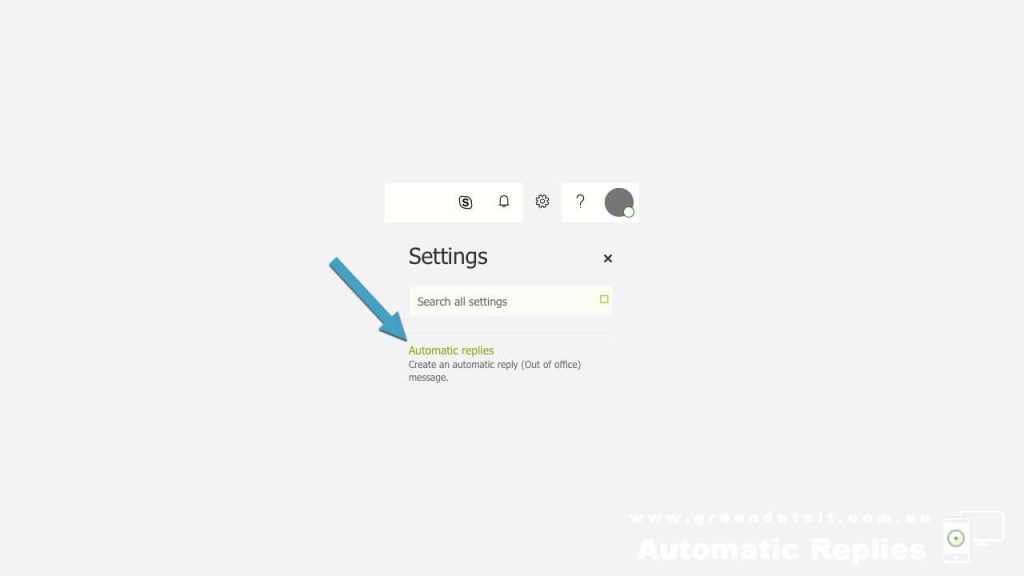
Click on the Cog icon in the top right corner.
Select Automatic replies from the list and click on it.
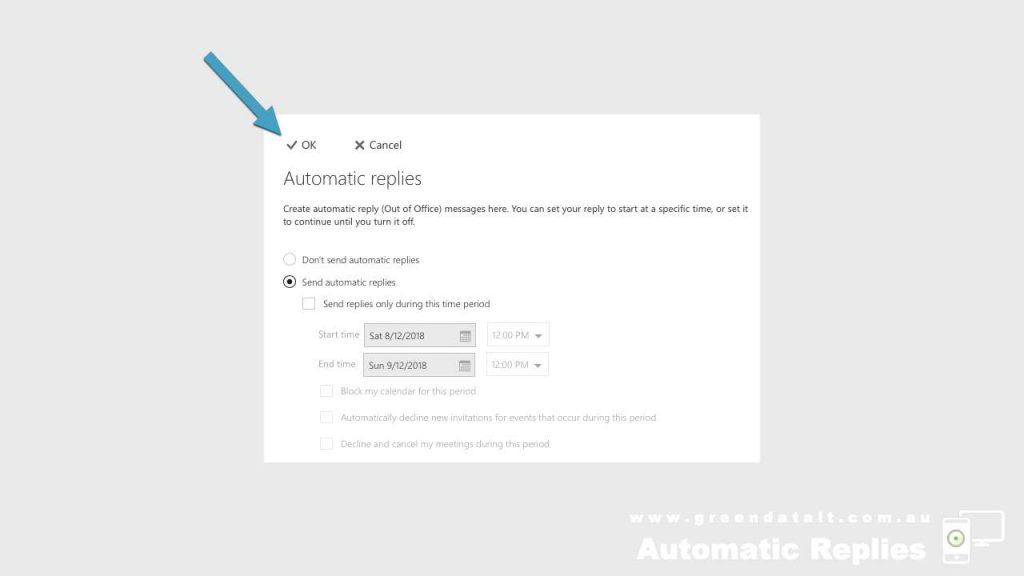
Then choose “Send automatic replies” option.
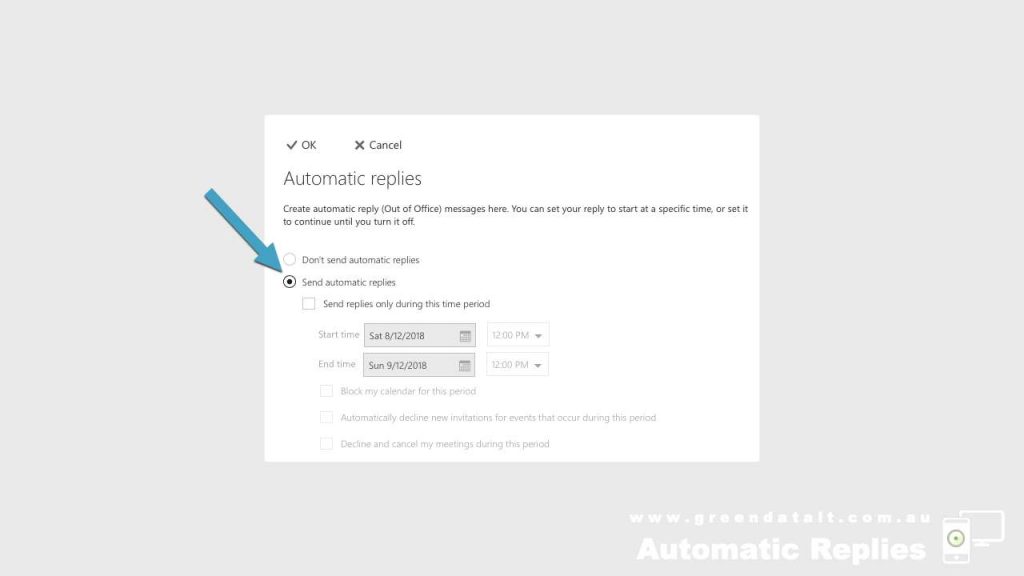
You can select dates you are wanting the automatic reply to operate here by clicking on the “send replies only during this time period” or don’t check the box if you want your Automatic Replies on indefinitely.
Create a message for the people in your business.
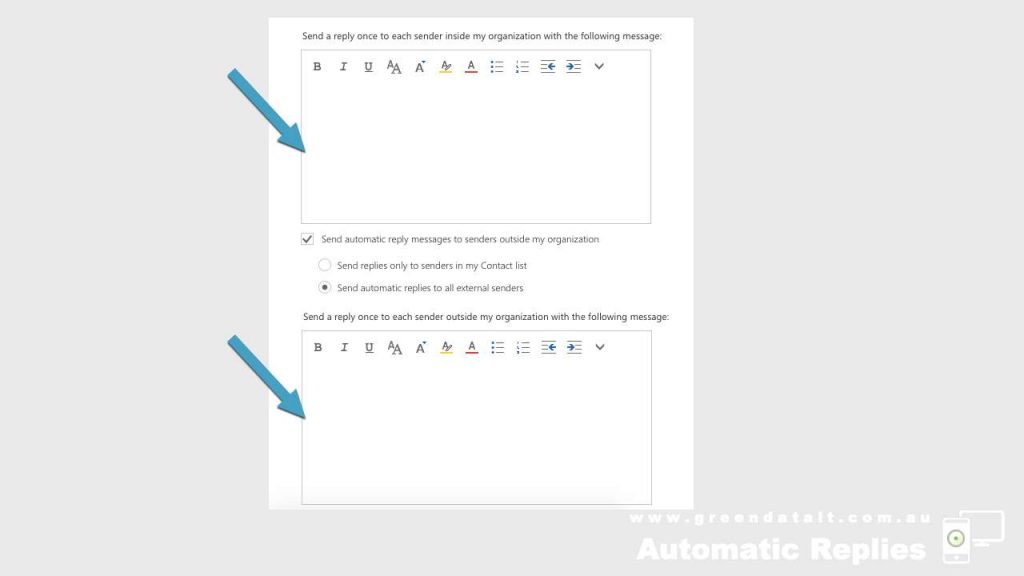
Then create a message to be emailed to the people outside of your business.
When you have checked over your messages and the dates click the OK in the top left hand corner to complete the setup.
There you go, that’s it!
Now you can Sign out and head off, safe in the knowledge that anyone that tries to email will know you are sitting on a beach, sipping drinks with someone feeding you grapes while keeping your core temperature constant with a giant bamboo fan.
How do I turn off Automatic Replies in Outlook?
If the unspeakable happens and you missed your work so much you came back from holiday early or if you just need to turn off Automatic Replies for a little while when you are back online this is relatively easy too!
Here are the steps for you for turning off Outlook Automatic Replies, look at the above images and follow through the first four of them.
Log into your Microsoft 365 Business account.
Click on the Outlook App.
Click on the Cog icon in the top right corner.
Select Automatic replies from the list and click on it.
Choose the “Don’t send automatic replies” option.
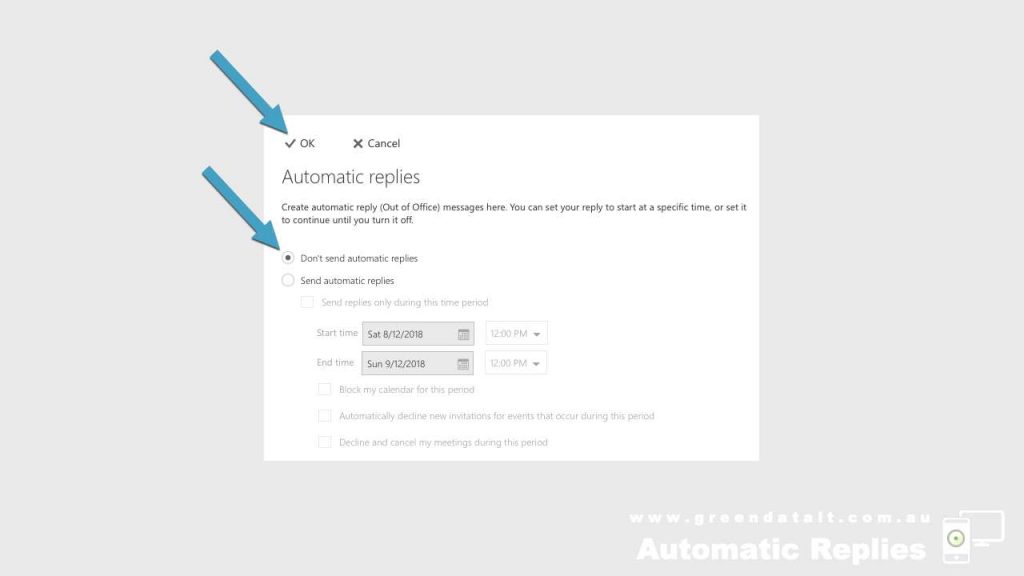
Finally, click the OK in the top left hand corner to complete the process the same as you have done when you set it up (see image above).
Now your Automatic Replies are turned off you can get back into it.
Easy!
The final word on Automatic Replies
Whether you’re turning Automatic Replies on or off the are many hidden gems inside Outlook for you to use to make your work and life a little simpler and productive.
And this is what we aim to give you consistently here in our Learn section of our website.
Thanks for dropping by Greendata and learning more about Automatic Replies, make sure you come back to see what’s new and learn a little more.
If you need help with setting up Outlook or if you are looking at taking that next step for your business by setting up Microsoft 365 Business or the any of the E3 or E5 Enterprise packages you can give us a call on 07 5526 0278 or leave your details in our messenger located at the bottom right of your screen.
Talk soon and make sure you enjoy your holiday!